An RV window shade are a critical component to RVing enjoyably. RVing is unique because many times you are close to other RVers so privacy, whether day or night is very important. A well lit RV during the day makes the camper a happy place. Sheri and I discovered the pleated day/night blinds and they have been a wonderful addition to our Tiny Texas Tumbleweed.
Get yourself decent shades! Isn’t privacy nice? Decent RV window shades is a big deal when you are in your camper and you don’t want people to see what you are doing!
Previously we took the Triple T (Tiny Texas Tumbleweed) out on its maiden voyage.
One of the things we found we really were not very happy with was the cheesy white aluminum blinds covering our RV windows.
Problems we found with the Triple-T’s aluminum blinds
- The lower clips for the aluminum blinds never really hold the blinds in place. This makes the blinds fly all over heck when you are driving getting them bent up.
- The RV aluminum blinds were bent up.
- The blinds were cut to fit the window leaving a small gap that would allow a unsavory person to view into our RV at night.
- The aluminum blinds never seem close all the way. As a result, I always feel that I didn’t turn the rod all the way enough.
Too many names!
As with most things there are two many names for the same thing. You will find most of these things to mean the same thing and I might even use more than one word to describe a blind.
- RV blinds
- RV shades
- RV window covering
- RV window treatment
- RV shade screen – I think this is a very loosely used word.
- RV sun screen
- (others? leave a comment for me… love to hear…)
So the VERY first thing we did to get the Triple-T up and running with new RV window shades was to do the following;
- Measure the windows (the pictures below will explain more).
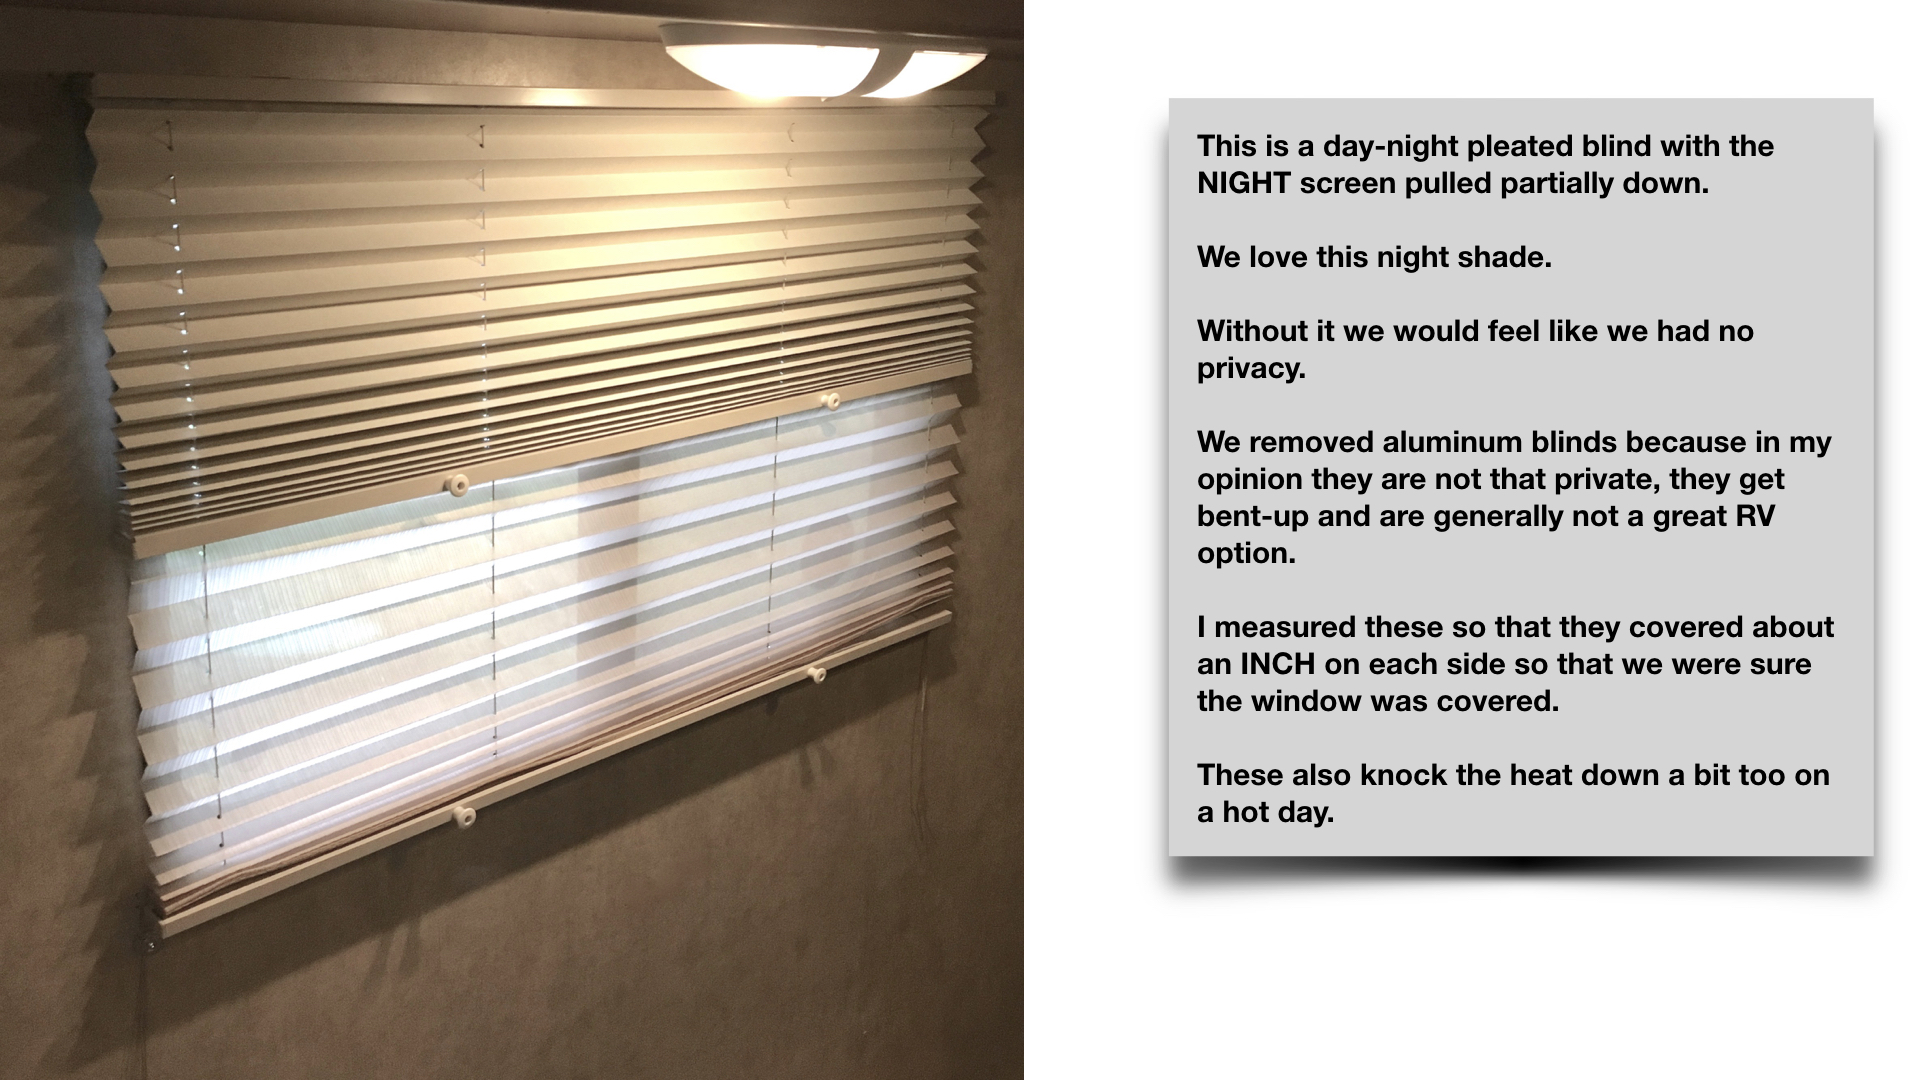
- I would add an extra inch on each side of the window which adds 2 inches of width. If you don’t you’ll have cracks which people could see through at night.
- It seems wise to add an extra inch to the bottom to be sure it covers.
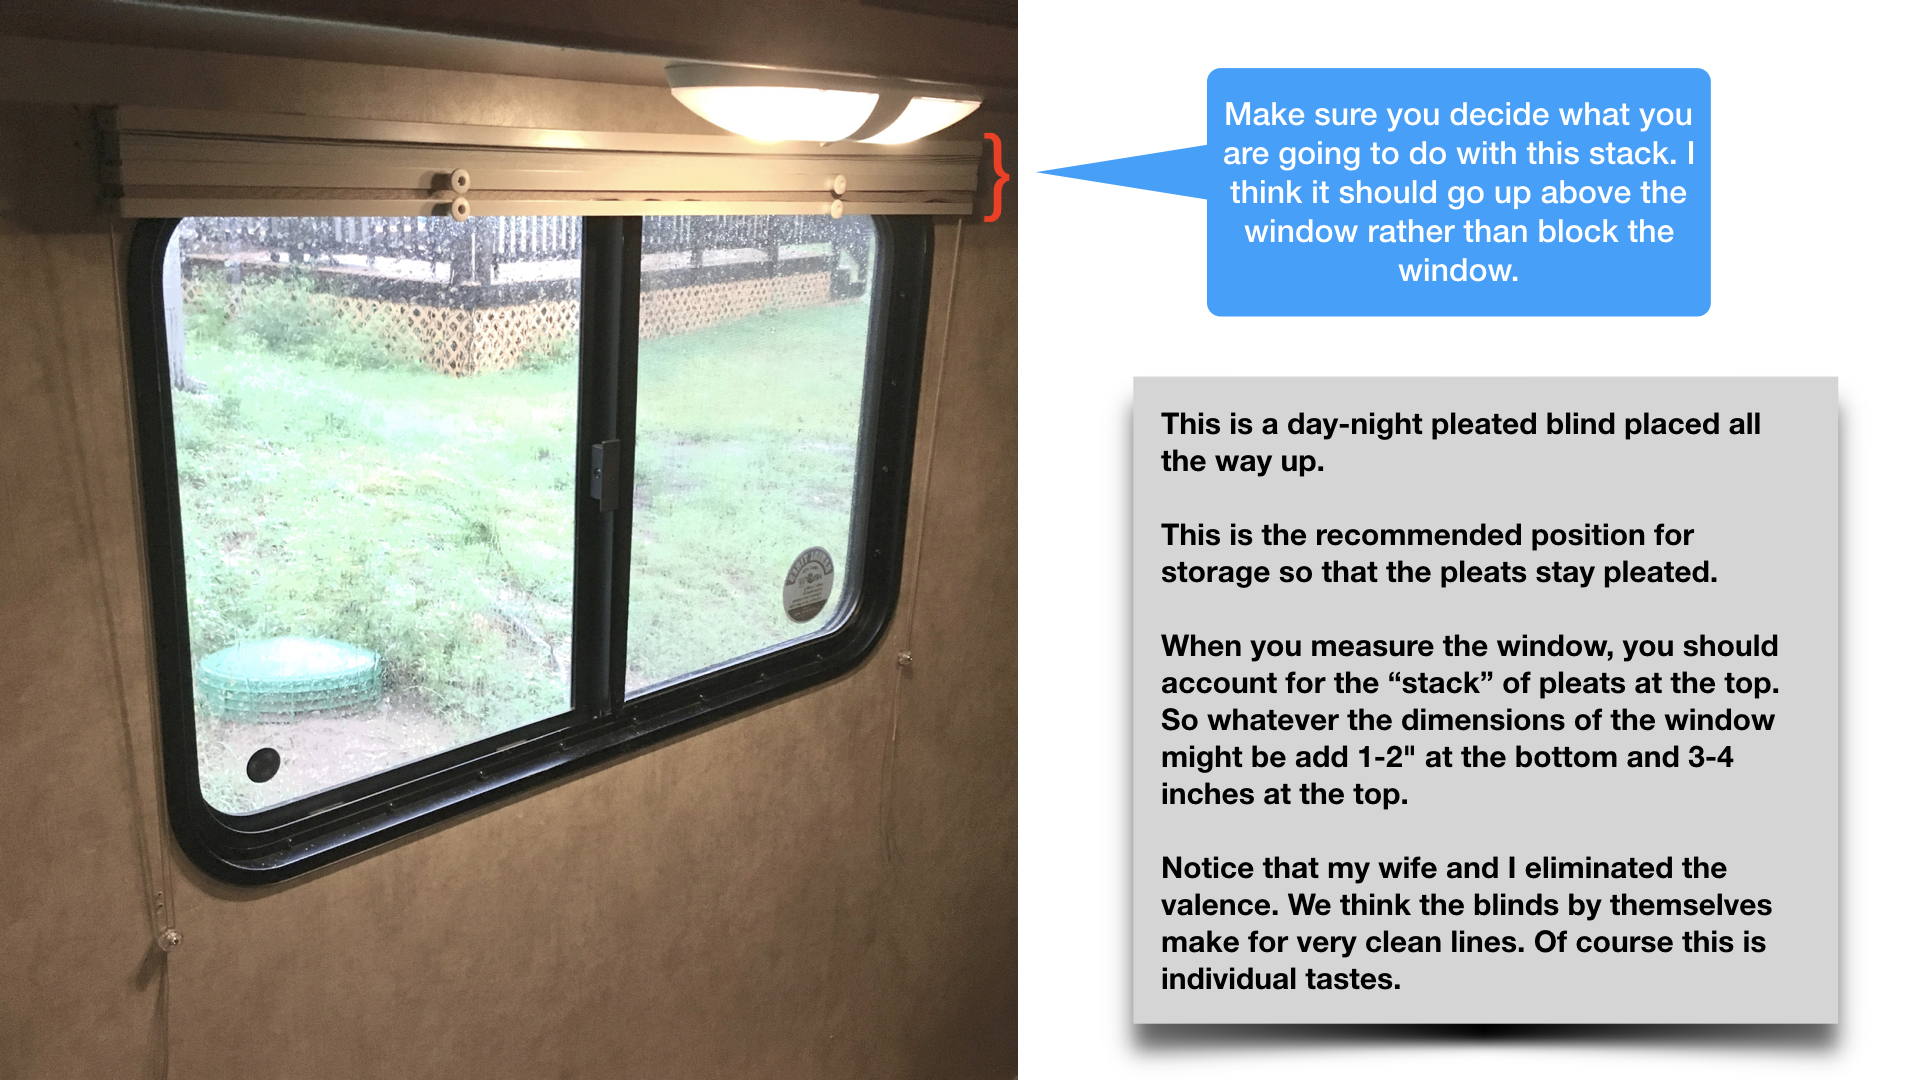
- We added an extra 2″ to the top of the window so that the “stack of pleats” could go above the window.
- Order the shades. We order ours from Camping World. More on that later.
- Specialty United Shade RV Window Shades via Camping World
- Don’t get the pull-cord option if one is offered. Use the tension sliding system called E-Z lift.
- For the record – these are super hard to find.
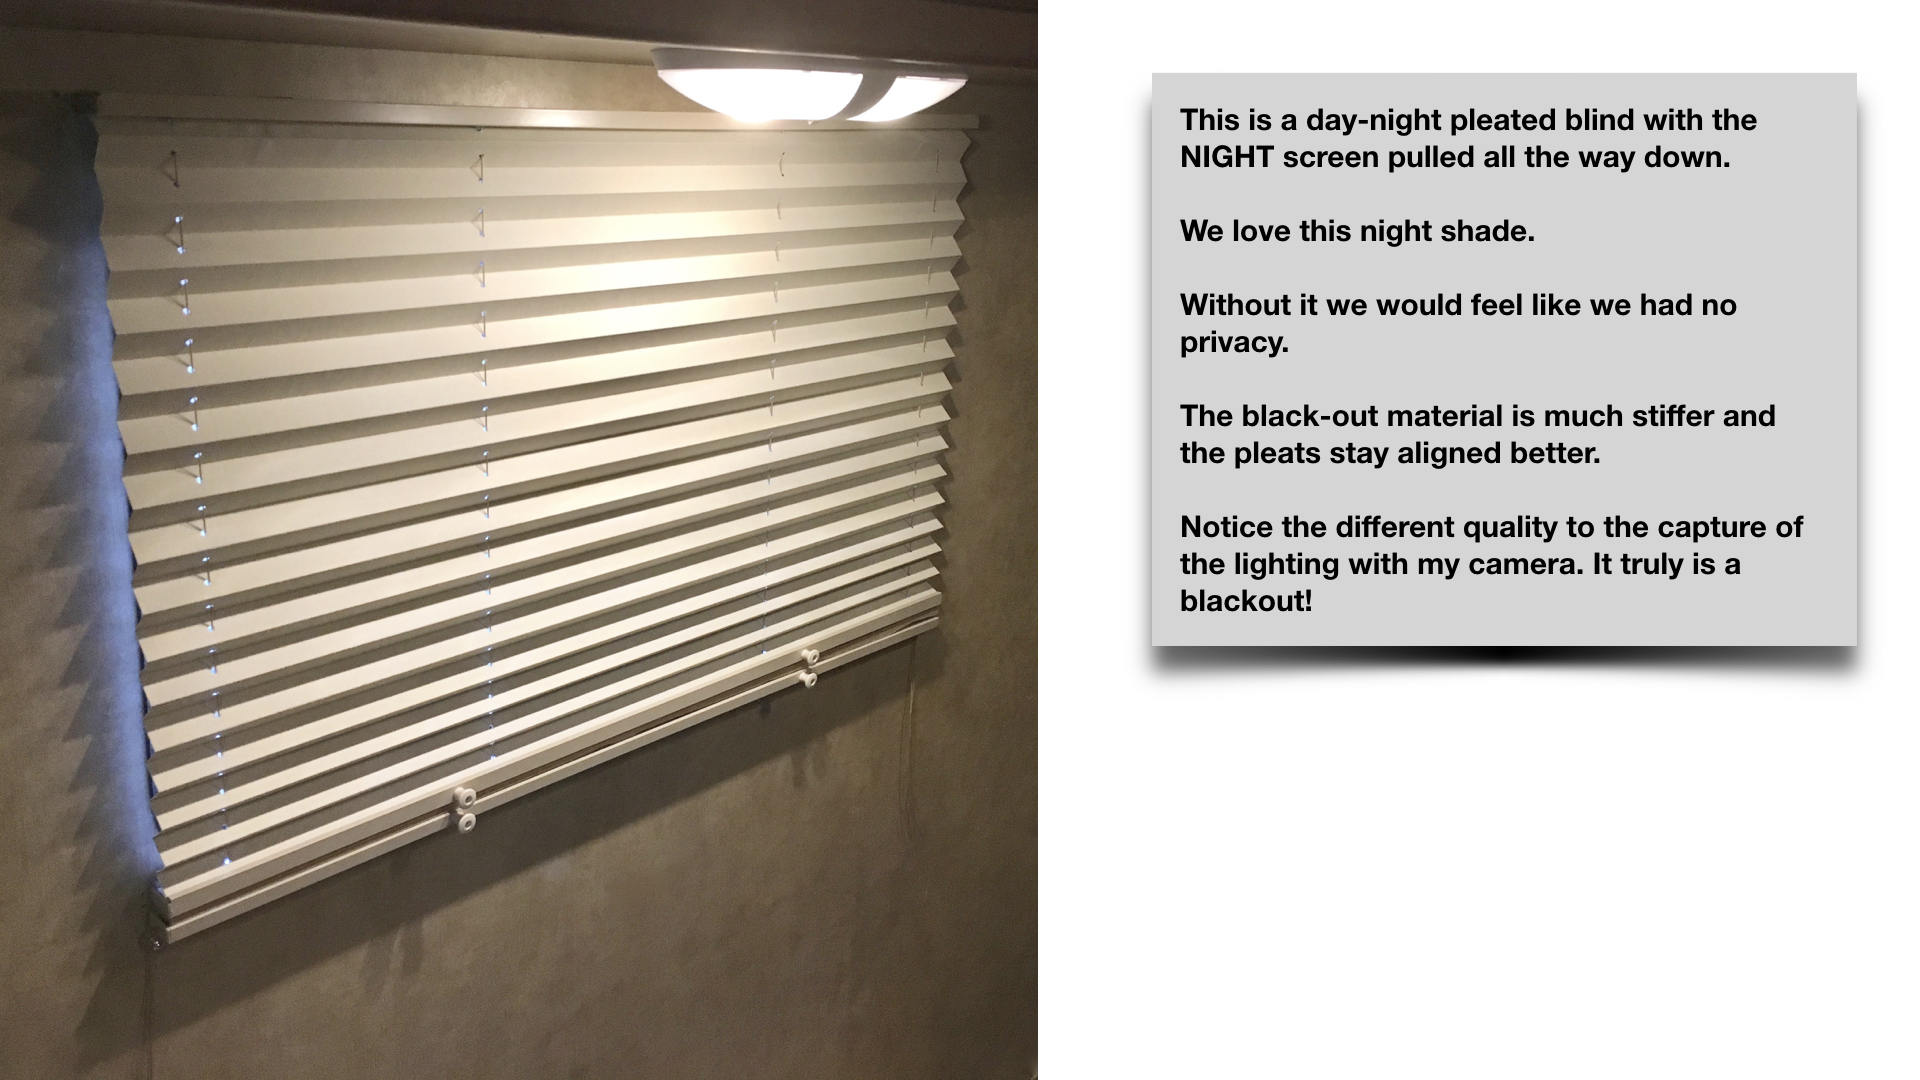
- Buy the day night shades. We didn’t know exactly what day night shades were but they seemed better so we paid more and got them. See pictures to explain completely. Boy are we glad we bought the RV window shades in the day night variety.
- We DID
- receive these RV window shades.
- install these RV window shades.
- and will vouch for these RV window shades.
- replace 3 windows with RV window shades – 2 were identical and 1 was larger.
- Specialty United Shade RV Window Shades via Camping World
- Take down the current RV blinds which will be a yukky rv window shade.
- We took down the sconces. We think the RV looks cleaner and less crowded without them. I like that Sheri is a minimalist.
When we received the RV window shades from United Shade, Camping Worlds supplier, they came in a very compact box and were wrapped in rubber bands. Since we received them very quickly, I’m nearly 100% sure they were made in the United States rather than China. I think that is worth something.
Here the basic steps to installing these RV window shades. Please refer to the pictures below to help explain what I’m writing.
- Using the attached screws, attach the RV window shade mounting brackets a couple of inches above the window and 3-4 inches in from each end.
- The instructions from United Shade aren’t too bad at showing this.
- I was hesitant to use the screws but the RV wall material seems more solid than you would think to hold the shades. The shades are very light weight.
- Look at your pleat stack to see how high above the window you want to mount.
- Clip the shades into the mounting brackets. You sort of scoop up from bottom rear to front and rotate the rear of the blinds up into the bracket. This sentence won’t make any sense until you do it once.
- HINT: Try putting the bracket onto the blind BEFORE you put it up so you see how it works.
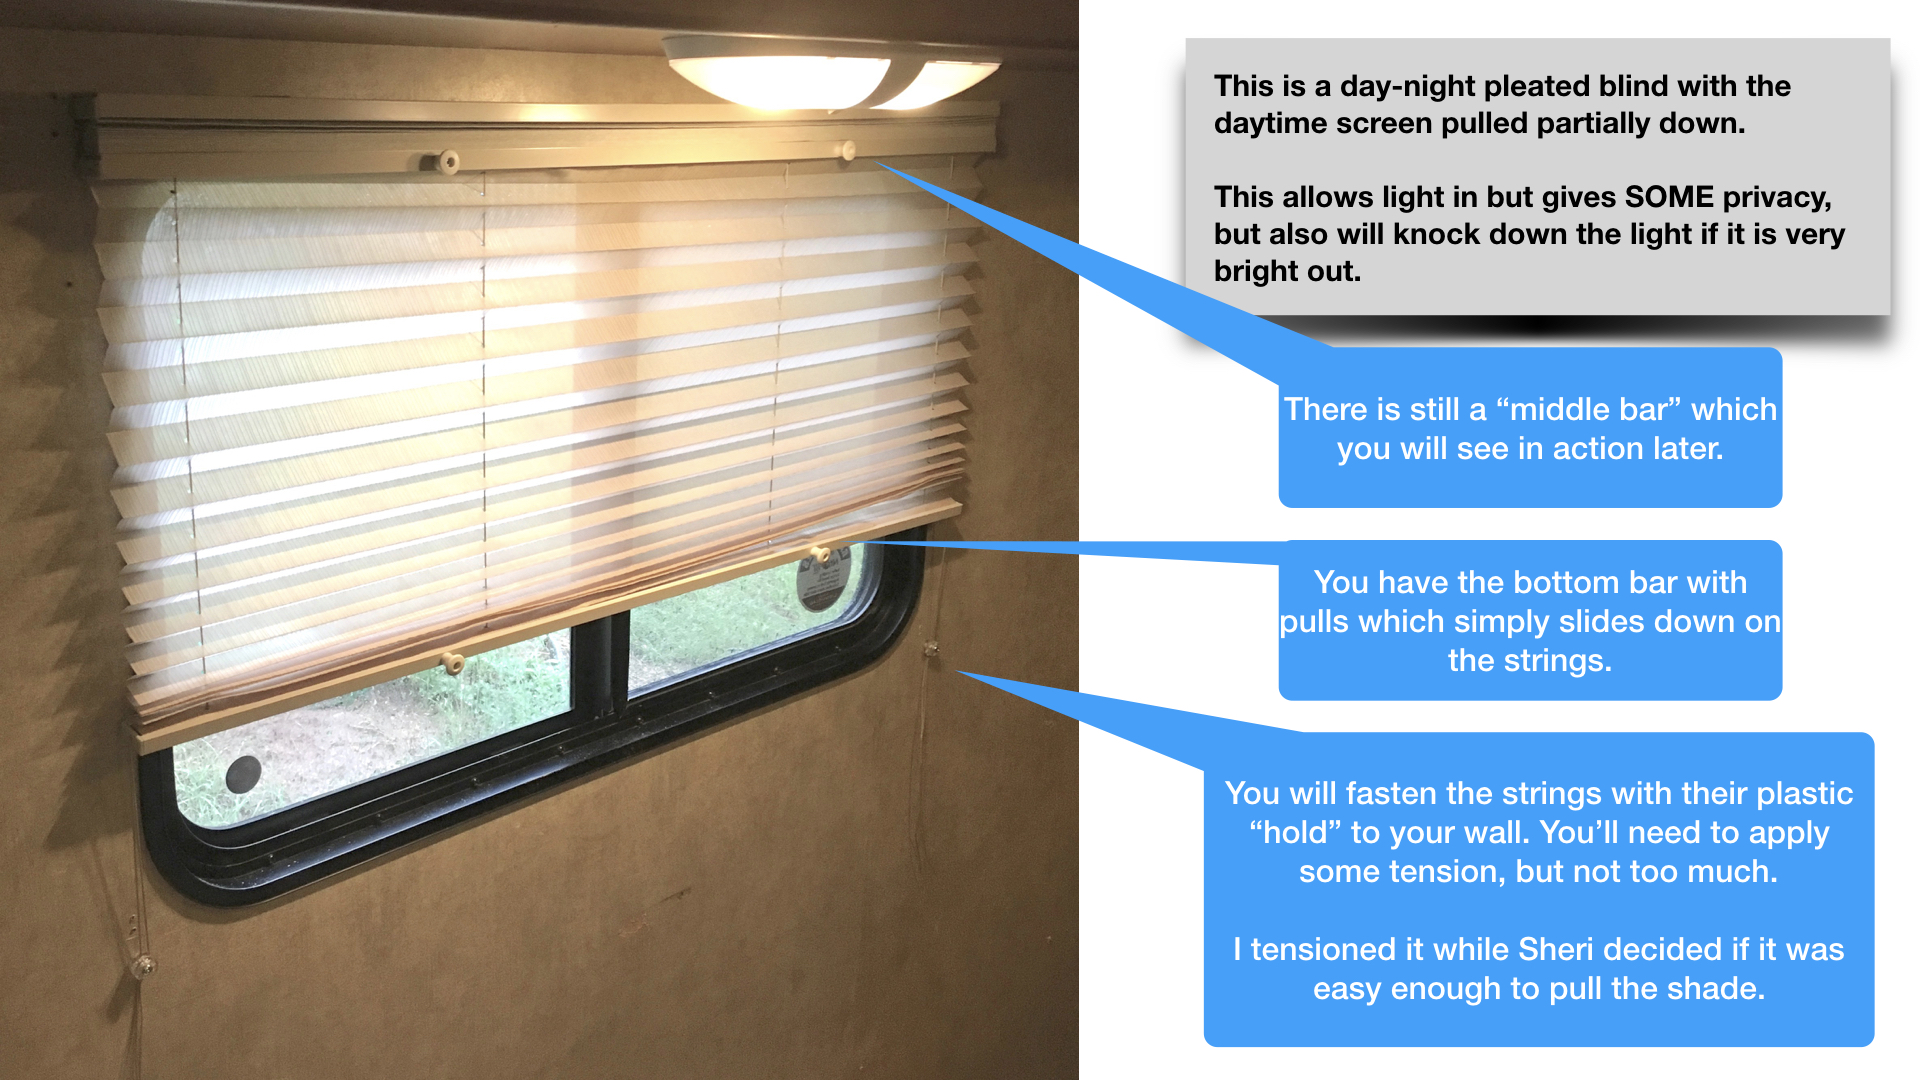
- Go ahead and take the little plastic round do-hickeys and pull them out along the string until they get to the knot in the end. Do this for each side.
- Now hold each do-hickey straight down from the rv window shades lower slider rod.
- Put a little tension on each doohickey. Not too much as not too much is needed.
- Have your better half slide the shades up and down and tell you “that tension is about right”.
- Then put a screw in each round do-hickey to keep it in place and have a decent amount of tension.
Here are some fun notes on these tension style rv window shades:
- I love these day nigh shades.
- Be gentle with the tension strings they will wear out.
- You can restring them… if you hate yourself. Likely you will be quite happy spending another $50 (or more) for a new shade rather than torture yourself with a restringing project.
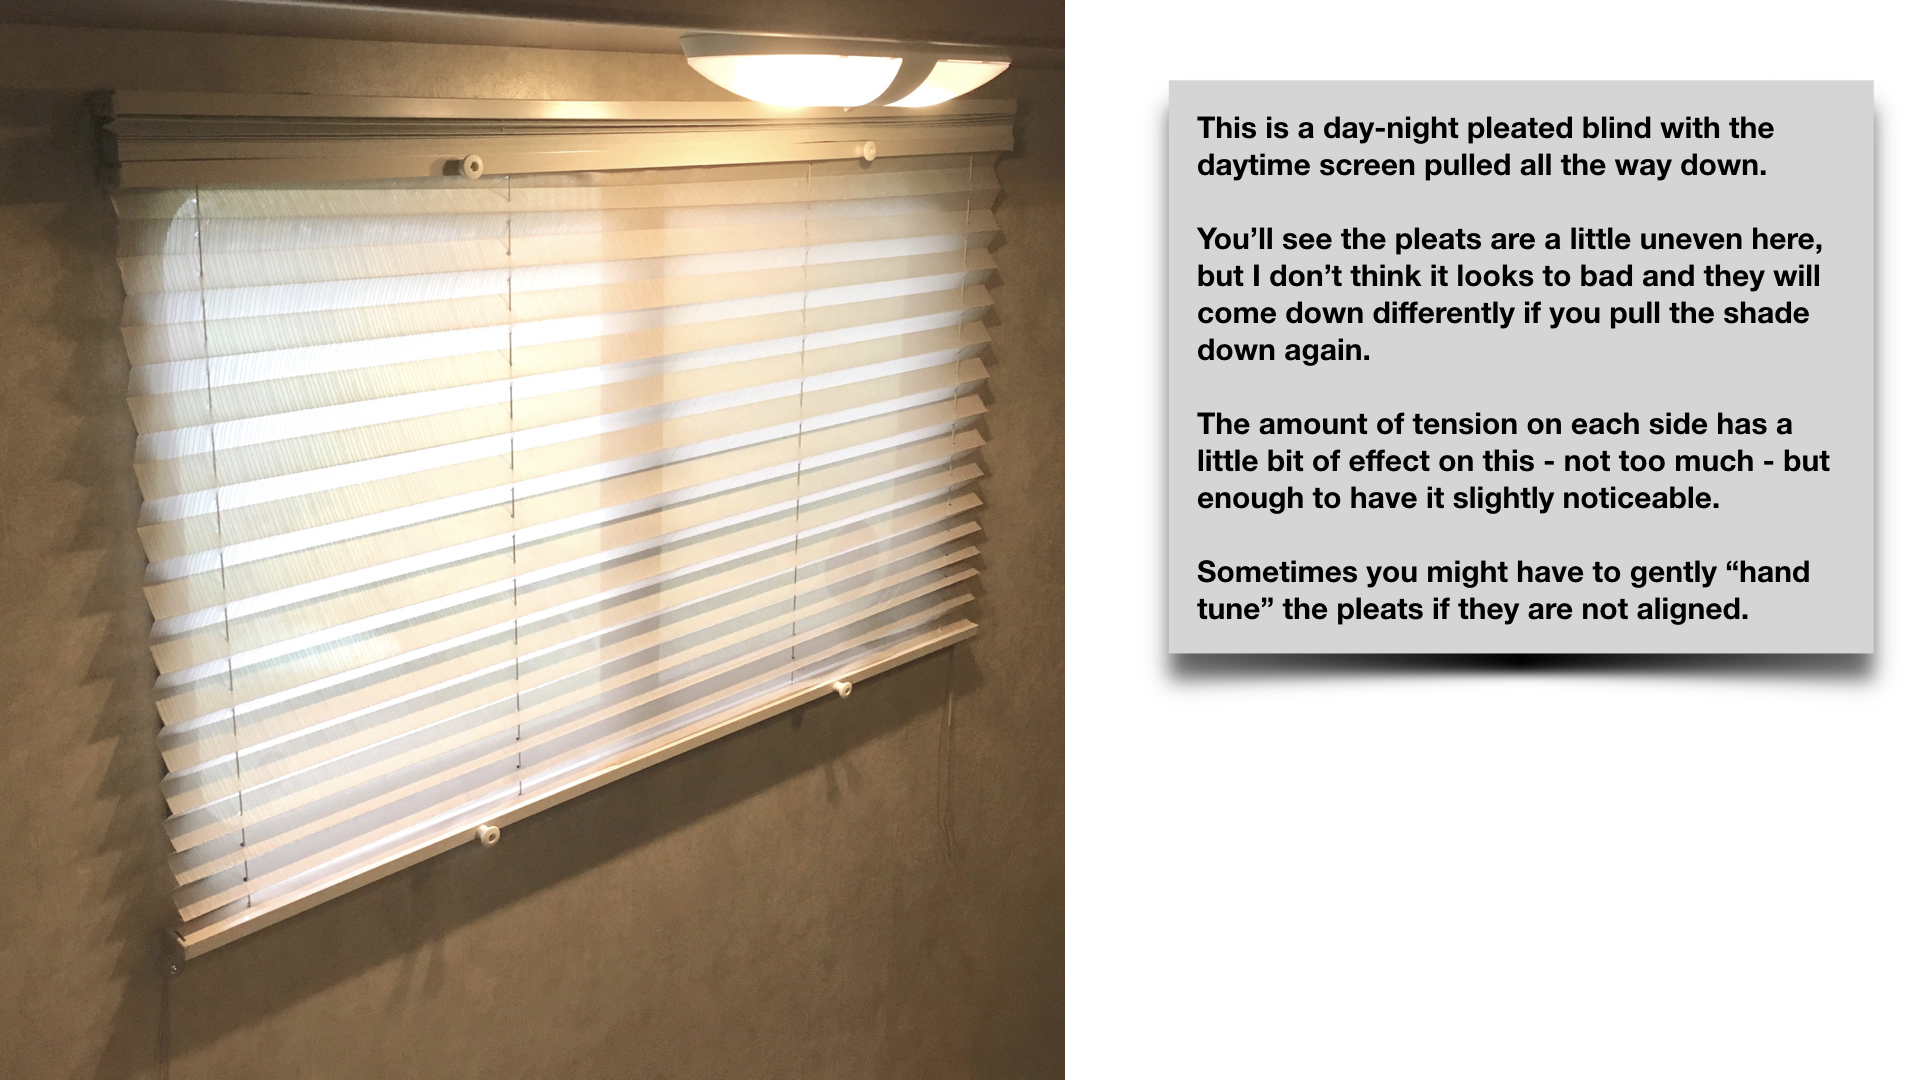
- The pleats will get a little uneven. But they will get even too. You’ll see. But I think they look sharp no matter what.
Check out the pictures below.
Please leave comments with any of your RV window shade installation notes. This is how I did it and I’m no craftsperson.
